由于我们项目采用主框架 + iframe 方式嵌套页面( Vue 项目, 别问为什么这样做, 历史遗留): 主框架负责主页面布局及路由切换, 切换路由加载对应 iframe , 而 iframe 地址就是 Vue 项目打包后的路径; 所以每新开发一个页面, 就需要新建一个 Vue 工程, 而这就出现问题了
源码在此
项目现状
目前是有三个大项目: BridgeProduction, BaseProduction, EnterpriseProduction; 每个项目都有各自的文件夹, 比如 BridgeProduction 的 Demo 页面路径为(别问项目层级问题, 历史遗留):
1
2
3
4
| bridge-business-web/
├─ source-web/ .................├─ web 源码
│ ├─ BridgeProduction/ .......... ├─ BridgeProduction
│ │ ├─ Demo/ ...................... ├─ Demo
|
每新开发一个页面, 就需要在 Demo 同级创建一个 Vue 项目
- 新建项目如果用
vue-cli 创建, 创建以后还需要加入自己的配置和下载第三方组件
- 如果复制粘贴旧项目再
CRUD, 可能会有遗漏, 导致出现无用的代码; 又或者忘记改打包输出地址, 导致覆盖掉旧项目的打包文件; 而且大家一般不敢删 package.json 中的文件, 不知道这个依赖哪里使用了, 导致最后就像老太太的裹脚布–又臭又长
- 提取出一个基础模版项目, 把一些公共配置和第三方组件都配置好, 大家每次新建项目都拷贝这个项目.
目前来看确实是第三种最优, 而且我们以前也都是这么干的, 但还是有一点瑕疵: 虽然将公共配置都配置好了, 但每个项目肯定有个性化设置, 最简单的例子就是打包地址, 这个肯定都不一样, 总会有人拷贝模版项目后忘记修改打包路径, 导致编译以后找不到文件, 最后才发现这个问题, 还要修改后再打包
所以我们需要创建一个像 vue-cli 那样的工具, 通过我们输入或选择后, 生成我们想要的项目框架
实现思路
说实话做之前对脚手架工具就是仰望高端玩家的视角, 但做了之后发现实现一个简单易用的脚手架工具还真不难, 甚至挺有意思的.
整体的实现步骤是这样的:
创建脚手架执行文件
在终端执行下面命令:
1
2
3
4
| mkdir my-cli
cd my-cli
npm init -y
touch index.js
|
在 index.js 中输入如下内容:
1
2
3
| #!/usr/bin/env node
console.log('hello my-cli')
|
注意: 在使用 Node 开发命令行工具时, 所执行的入口 js 脚本中头部必须加入 #!/usr/bin/env node 声明
#!/usr/bin/env node 的意思就是找到对应的 node 脚本解释器来解释后面的内容.
在 my-cli 根目录下执行 node index.js 就可以看到控制台输出 hello my-cli .
在 package.json 中增加 bin 字段:
1
2
3
| "bin": {
"my-cli": "index.js"
}
|
然后使用 npm-link 命令把这个文件映射到全局后, 就可以在任意目录下的命令行中输入 my-cli 执行我们的 index.js 脚本文件:
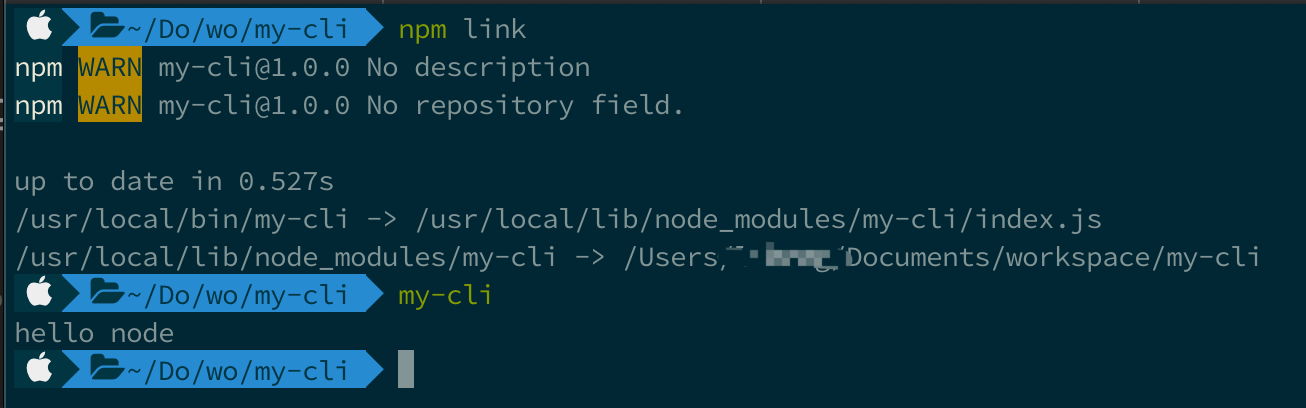
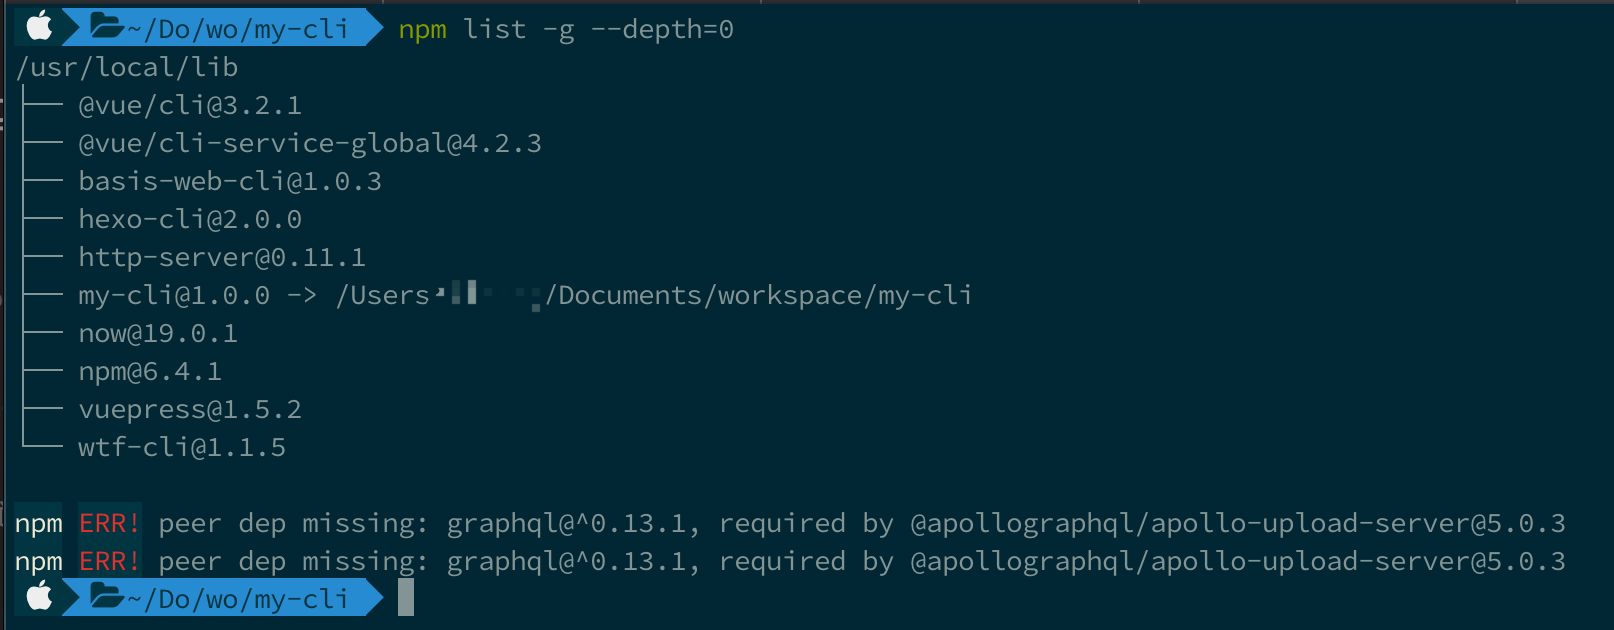
输入 npm list -g --depth=0 可以查看已安装的全局模块
到这里, 我们已经成功将一个脚本文件映射到全局, 也就是只要我们输入 package.json 中 bin 配置的 key 值也就是 my-cli 就可以执行我们 my-cli 文件夹下的 index.js 脚本了.
似乎有点内味了, 接下来就用 commander.js 去为我们的 my-cli 指令添加参数并且解析, 然后完成一系列的操作.
commander.js: 完整的 node.js 命令行解决方案, 灵感来自 Ruby 的 commander.
安装
引入
index.js :
1
| const { program } = require('commander')
|
然后在 index.js 中调用 program 的一些 api 完成指令的创建和解析.
使用
首先定义指令的版本号, 用于 my-cli -V 的输出:
1
| program.version(`my-cli ${require('./package').version}`)
|
这里我们直接将 package.json 中的版本号引入进来输出
现在创建一条 create 命令:
1
2
3
4
5
6
7
8
9
10
11
12
13
| program
.version(`my-cli ${require('./package').version}`)
.command('create <app-name>')
.description('create a new project powered by my-cli')
.option('-T, --template [template]', 'Enter a name of template')
.action((name, {
template = 'BridgeProduction'
}) => {
console.log( `成功创建项目: ${name}` )
console.log( `所使用的模板: ${template}` )
})
program.parse(process.argv)
|
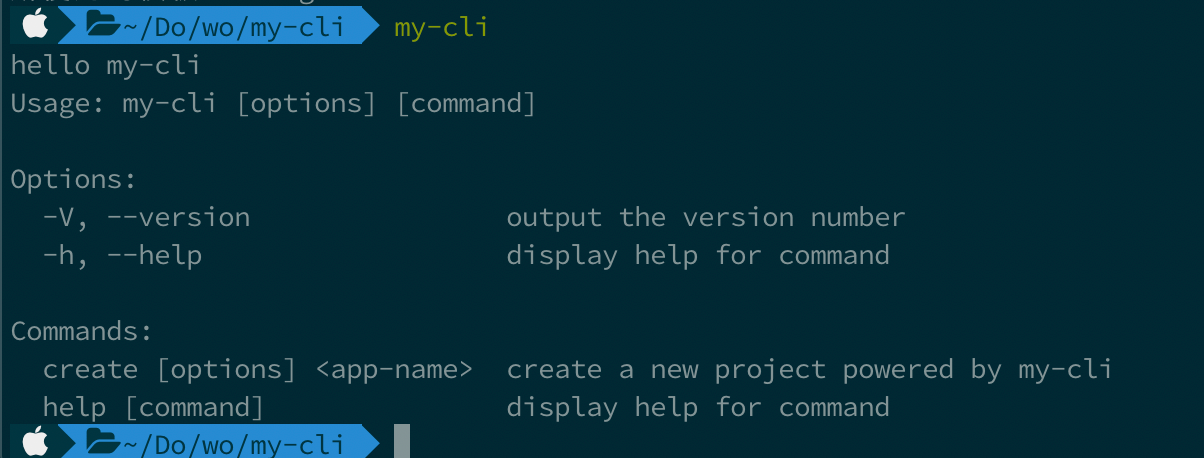
description 的值用于在使用 my-cli --help 或 my-cli 命令时看到对应的这条命令的描述信息:
options 则可以让我们输入一些选项参数, 当然这是可选的, 我们可以在指令后添加参数, 然后根据输入的参数去进行不同的操作.
parse 方法则是让命令行可以解析我们之前配置的命令.
在命令行中输入:
1
| my-cli create Demo -T BridgeProduction
|
或者
1
| my-cli create Demo --template BridgeProduction
|
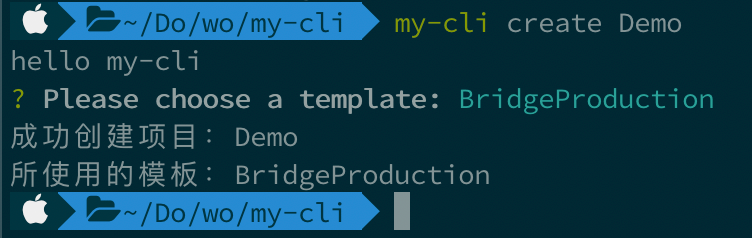
执行结果为:

当然, 这里只是模拟了创建的过程, 并没有真正创建模板, 后面我们会加入真正创建模板的操作. 这里输入的 template 参数可以让我们通过自定义的一个映射关系(比如用 Map)去映射到真正模板对应的 git 仓库地址, 进入创建模板.
但是我怎么知道都有哪些模板呢?
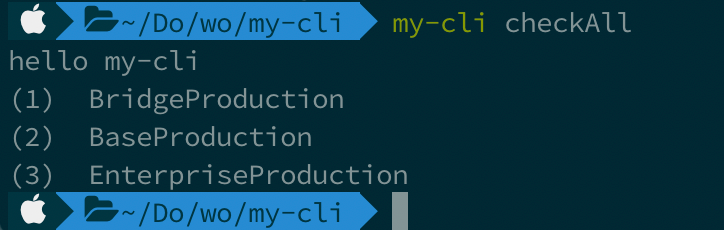
我们可以再创建一条 checkAll 指令, 去打印所有的模板名字, 注意要放在 program.parse(process.argv) 之前:
1
2
3
4
5
6
7
8
9
| program
.command('checkAll')
.description('Browse all the templates')
.action(() => {
const templateList = ['BridgeProduction', 'BaseProduction', 'EnterpriseProduction']
templateList.forEach((temp, index) => {
console.log(`(${index + 1}) ${temp}`)
})
})
|
当我们在命令行中输入 my-cli checkAll :
现在, 我们已经知道了怎么通过在命令行输入命令来执行操作, 我们核心的操作将在 create 这条配置的命令的 action 中去加入我们根据模板创建项目的逻辑, 但现在还不急于将这个逻辑加入进来, 我们先思考一个问题:
对于用户来说, 用户不能够很清晰的知道有哪些模板可以选择, 并且在输入模板名字这个方式交互上非常不友好, 用户输错了怎么办, 我们是不是又要对用户的输入做一系列的 if-else 判断. 如果一开始就让用户通过选择的方式去选择可用的模板就完美了.
这个需求可以做! 多亏 inquirer.js 这个库, 让我们可以在命令行交互上有了丰富的选择~
安装
引入
1
| const inquirer = require('inquirer')
|
使用
在 index.js 中:
1
2
3
4
5
6
7
8
9
10
11
12
13
14
15
16
17
18
19
20
21
22
23
24
25
26
27
28
29
30
31
| program
.version(`my-cli ${require('./package').version}`)
.command('create <app-name>')
.description('create a new project powered by my-cli')
.action(async name => {
const {
template
} = await inquirer.prompt([{
name: 'template',
type: 'rawlist',
message: 'Please choose a template:' ,
default: 'BridgeProduction',
choices: [{
name: 'BridgeProduction(桥梁)',
value: 'BridgeProduction'
},
{
name: 'BaseProduction(基建项目)',
value: 'BaseProduction'
},
{
name: 'EnterpriseProduction(基建企业)',
value: 'EnterpriseProduction'
}
]
}])
console.log( `成功创建项目: ${name}` )
console.log( `所使用的模板: ${template}` )
})
program.parse(process.argv)
|
现在执行我们的 my-cli create Demo 看看什么效果:
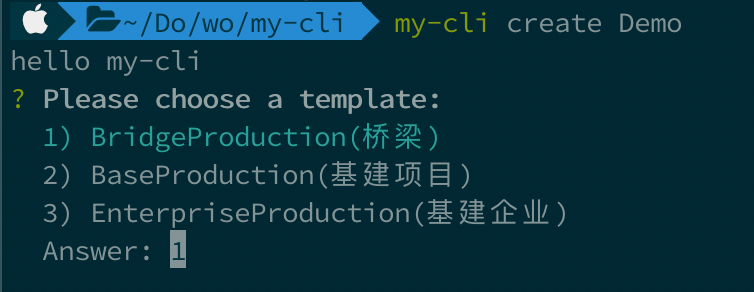
上下键选择模板, 回车确认:
这样就可以通过 上下选择,回车确认 的方式去看到所有的模板并且选择我们所需要的模板了~
现在我们的整个交互流程已经完成了, 那么接下来就开始最重要的环节:创建工程化模板和根据选择的模板创建项目
创建工程化模板并 push 到 GitHub
创建基础模版
由于我们有了一个基础模版, 所以创建工程化模版这块就可以省略了
如果没有的话, 可以参照官网创建一个项目 | Vue CLI来创建模版项目
设置替换关键字
前面也说了, 有一些是每个项目都有但每个项目又不同的个性化的设置, 比如打包路径, 所以我们需要将打包路径设置为一个替换关键字, 方便创建项目后替换为该项目的设置
比如 BridgeProduction 的 Demo 项目打包路径为: ../resources/BridgeProduction/Demo
BaseProduction 的 Demo 项目打包路径为: ../resources/BaseProduction/Demo
这样我们就可以设置一个打包路径的替换关键字:
1
2
|
outputDir: '../resources/replaceOutputDir'
|
replaceOutputDir 就是我们要替换的关键字, 当然名字随便起, 只要保证在项目中是唯一即可; 而我们前面能拿到 name 和 template , 所以我们只需要将 ${replaceOutputDir} 替换为 ${template}/${name} 即可, 这个下面会说到
推送到 GitHub 远程仓库
首先, 在自己的 github 中创建一个空仓库, 命名就以模板的名字命名不易混乱, 比如 base-template .
在 base-template 项目路径下的控制台中依次执行以下命令:
替换第二条命令中的 username/base-template 为 自己的用户名/仓库名称
下面还会出现多次, 请留意替换
1
2
3
4
5
6
| git init
git add .
git commit -m "first commit"
git branch -M master
git remote add origin https://github.com/username/base-template.git
git push -u origin master
|
现在已经创建好了模板并且推送到 git 仓库中了, 接下来就使用 download-git-repo 这个插件去用我们准备好的模板在本地创建我们的工程化项目了.
回到我们 my-cli 的控制台中
安装
引入
1
| const download = require('download-git-repo')
|
使用
1
2
3
4
5
6
7
8
9
10
11
12
13
14
15
16
17
18
19
20
21
22
23
24
25
26
27
28
29
30
31
32
33
34
35
36
37
38
39
40
| program
.version(`my-cli ${require('./package').version}`)
.command('create <app-name>')
.description('create a new project powered by my-cli')
.action(async name => {
const {
template
} = await inquirer.prompt([{
name: 'template',
type: 'rawlist',
message: 'Please choose a template:' ,
default: 'BridgeProduction',
choices: [
{
name: 'BridgeProduction(桥梁)',
value: 'BridgeProduction'
},
{
name: 'BaseProduction(基建项目)',
value: 'BaseProduction'
},
{
name: 'EnterpriseProduction(基建企业)',
value: 'EnterpriseProduction'
}
]
}])
download('username/base-template', name, error => {
if (error) {
console.log(`创建 ${name} 项目失败`)
console.log('失败原因: ', error)
} else {
console.log(`成功创建项目: ${name}`)
console.log(`所使用的模板: ${template}`)
}
})
})
program.parse(process.argv)
|
核心就是调用 download 方法进行下载模板到本地, 建议先看看文档
到目前为止, 我们已经可以在选定的目录创建新项目
但我们总共有三个大项目, 万一创建的 BridgeProduction 项目却在 BaseProduction 目录下, 这不就有问题了吗?
所以我们需要检查一下路径是否正确
检查路径
首先我们需要整理一下哪些路径是正确的, 以 BridgeProduction 的 Demo 为例:
bridge-business-web 目录是否正确? 正确, 下载路径为: source-web/${template}/${name}source-web 目录是否正确? 正确, 下载路径为: ${template}/${name}BridgeProduction 目录是否正确? 正确, 下载路径为: ${name}- 其他目录是否正确? 不正确
所以我们可以定义一个 map 来映射正确目录:
创建一个放置常量的文件 constant.js :
1
2
3
4
5
6
7
8
9
10
11
12
13
14
15
16
17
| exports.PATH_MAP = {
BridgeProduction: {
'bridge-business-web': 'source-web/BridgeProduction',
'source-web': 'BridgeProduction',
BridgeProduction: ''
},
BaseProduction: {
'basis-facility-web': 'bimbasisstatic/BaseProduction',
bimbasisstatic: 'BaseProduction',
BaseProduction: ''
},
EnterpriseProduction: {
'basis-facility-web': 'bimbasisstatic/EnterpriseProduction',
bimbasisstatic: 'EnterpriseProduction',
EnterpriseProduction: ''
}
}
|
再创建一个检查路径是否正确的文件 checkPath.js
1
2
3
4
5
6
7
8
9
10
11
12
13
14
15
| const path = require('path')
const {
PATH_MAP
} = require('./constant')
module.exports = function checkPath (name, type) {
const basename = path.basename(process.cwd())
const joinPath = PATH_MAP[type][basename]
if (joinPath !== undefined) {
return path.join(joinPath, name)
} else {
console.log('Current path is illegal, please check it')
process.exit(-1)
}
}
|
在 index.js 中引入:
1
2
3
4
5
6
7
8
9
10
11
12
13
14
15
16
17
18
19
20
21
22
23
24
25
26
27
28
29
30
31
32
33
34
35
36
37
38
39
40
41
42
| const checkPath = require('./checkPath')
program
.version(`my-cli ${require('./package').version}`)
.command('create <app-name>')
.description('create a new project powered by my-cli')
.action(async name => {
const {
template
} = await inquirer.prompt([{
name: 'template',
type: 'rawlist',
message: 'Please choose a template:' ,
default: 'BridgeProduction',
choices: [
{
name: 'BridgeProduction(桥梁)',
value: 'BridgeProduction'
},
{
name: 'BaseProduction(基建项目)',
value: 'BaseProduction'
},
{
name: 'EnterpriseProduction(基建企业)',
value: 'EnterpriseProduction'
}
]
}])
const dirPath = checkPath(name, template)
download('username/base-template', dirPath, error => {
if (error) {
console.log(`创建 ${name} 项目失败`)
console.log('失败原因: ', error)
} else {
console.log(`成功创建项目: ${name}`)
console.log(`所使用的模板: ${template}`)
}
})
})
program.parse(process.argv)
|
测试一下是否生效:

完全没问题, 接下来我们就使用 replace-in-file 来替换我们的关键字
安装
引入
1
| const replace = require('replace-in-file')
|
使用
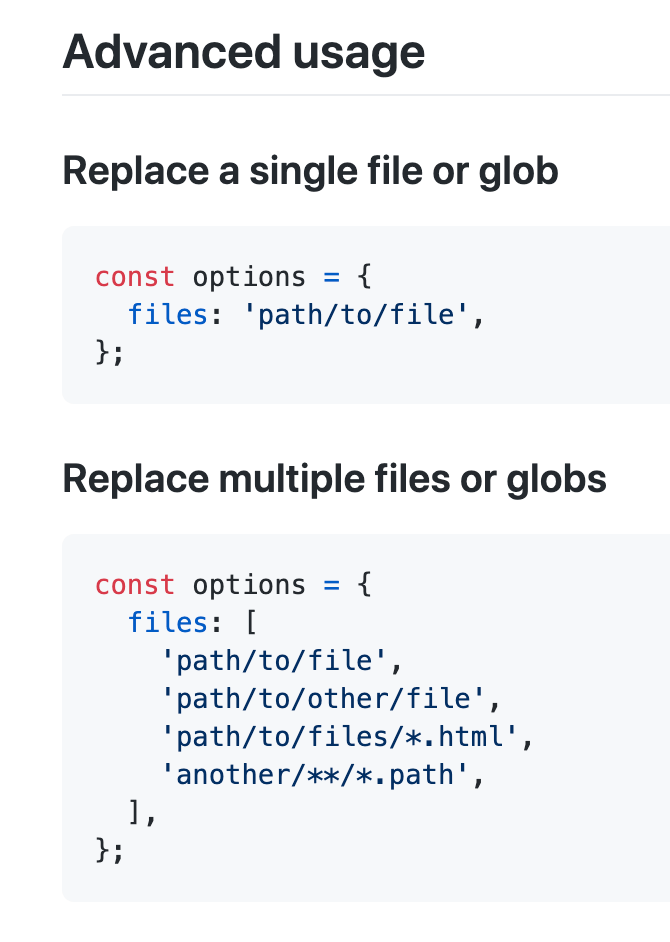
注意: 它不支持全局文件夹匹配, 如果要把文件夹里的所有文件都替换, 那你需要在 options 全部列举出来, 虽然它支持通配符, 但是层级还是固定的, 如果哪天我们的目录层级变了, 就很僵了
所以我们需要一个方法来获取全部文件(当然如果你能确定需要替换哪些文件并且路径以后都不变的话, 也可以写死)
安装 fs-extra :
新建一个 file.js 文件:
1
2
3
4
5
6
7
8
9
10
11
12
13
14
15
16
17
18
19
20
21
22
23
24
25
| const fs = require('fs-extra')
const path = require('path')
exports.loadAllFiles = filePath => {
let files = []
const loadFiles = filePath => {
const fileDirs = fs.readdirSync(filePath)
fileDirs.forEach(filename => {
const fileDir = path.join(filePath, filename)
const stat = fs.statSync(fileDir)
if (stat.isDirectory()) {
loadFiles(fileDir)
} else if (stat.isFile()) {
files.push(fileDir)
} else {
console.log(`Invalid local preset path: ${fileDir}`)
return
}
})
}
loadFiles(filePath)
return files
}
|
在 index.js 中引入:
1
2
3
4
5
6
7
8
9
10
11
12
13
14
15
16
17
18
19
20
21
22
23
24
25
26
27
28
29
30
31
32
33
34
35
36
37
38
39
40
41
42
43
44
45
46
47
48
49
50
51
52
53
| const path = require('path')
const replace = require('replace-in-file')
const {
loadAllFiles
} = require('./file')
program
.version(`my-cli ${require('./package').version}`)
.command('create <app-name>')
.description('create a new project powered by my-cli')
.action(async name => {
const {
template
} = await inquirer.prompt([{
name: 'template',
type: 'rawlist',
message: 'Please choose a template:' ,
default: 'BridgeProduction',
choices: [
{
name: 'BridgeProduction(桥梁)',
value: 'BridgeProduction'
},
{
name: 'BaseProduction(基建项目)',
value: 'BaseProduction'
},
{
name: 'EnterpriseProduction(基建企业)',
value: 'EnterpriseProduction'
}
]
}])
const dirPath = checkPath(name, template)
download('username/base-template', dirPath, error => {
if (error) {
console.log(`创建 ${name} 项目失败`)
console.log('失败原因: ', error)
} else {
const files = loadAllFiles(dirPath)
const options = {
files,
from: 'replaceOutputDir',
to: path.join(template, name)
}
replace.sync(options)
console.log(`成功创建项目: ${name}`)
console.log(`所使用的模板: ${template}`)
}
})
})
program.parse(process.argv)
|
至此就完成了. 等等, 我们好像还没有校验重名
在 file.js 中增加方法:
1
2
3
4
5
6
7
8
9
10
11
12
13
14
15
16
17
18
19
20
21
22
23
24
25
26
27
28
29
30
31
| const inquirer = require('inquirer')
exports.existsSync = async name => {
if (fs.existsSync(name)) {
const {
action
} = await inquirer.prompt([{
name: 'action',
type: 'list',
message: `Target directory ${name} already exists. Pick an action:` ,
default: false,
choices: [
{
name: 'Overwrite',
value: true
},
{
name: 'Cancel',
value: false
}
]
}])
if (action) {
console.log(`Removing ${name} ...`)
await fs.remove(name)
console.log(`removed ${name} successfully`)
} else {
process.exit(-1)
}
}
}
|
在 index.js 中引入
1
2
3
4
5
6
7
8
9
10
11
12
13
14
15
16
17
18
19
20
21
22
23
24
25
26
27
28
29
30
31
32
33
34
35
36
37
38
39
40
41
42
43
44
45
46
47
48
49
50
51
52
53
| const {
loadAllFiles,
existsSync
} = require('./file')
program
.version(`my-cli ${require('./package').version}`)
.command('create <app-name>')
.description('create a new project powered by my-cli')
.action(async name => {
const {
template
} = await inquirer.prompt([{
name: 'template',
type: 'rawlist',
message: 'Please choose a template:' ,
default: 'BridgeProduction',
choices: [
{
name: 'BridgeProduction(桥梁)',
value: 'BridgeProduction'
},
{
name: 'BaseProduction(基建项目)',
value: 'BaseProduction'
},
{
name: 'EnterpriseProduction(基建企业)',
value: 'EnterpriseProduction'
}
]
}])
const dirPath = checkPath(name, template)
await existsSync(dirPath)
download('username/base-template', dirPath, error => {
if (error) {
console.log(`创建 ${name} 项目失败`)
console.log('失败原因: ', error)
} else {
const files = loadAllFiles(dirPath)
const options = {
files,
from: 'replaceOutputDir',
to: path.join(template, name)
}
replace.sync(options)
console.log(`成功创建项目: ${name}`)
console.log(`所使用的模板: ${template}`)
}
})
})
program.parse(process.argv)
|

至此就完成了从命令行到创建自己定制化的初始工程项目的完整功能
功能上是没问题了, 但是好像还有一个问题: 这些命令行是不是长得太平平无奇有点单调了? 并且这个下载的过程有点呆头呆脑, 能不能整个骚气一点的?
下面就让我们用 ora 和 chalk 这两个库去美化我们的命令行输出~
使用 ora 和 chalk 美化命令行
使用 ora 增加 loading 效果:
安装
引入
1
| const ora = require('ora')
|
使用
index.js 中:
1
2
3
4
5
6
7
8
9
10
11
12
13
14
15
16
17
18
19
20
21
22
23
24
25
26
27
28
29
30
31
32
33
34
35
36
37
38
39
40
41
42
43
44
45
46
47
48
49
50
51
52
53
54
55
56
57
| program
.version(`my-cli ${require('./package').version}`)
.command('create <app-name>')
.description('create a new project powered by my-cli')
.action(async name => {
const {
template
} = await inquirer.prompt([{
name: 'template',
type: 'rawlist',
message: 'Please choose a template:' ,
default: 'BridgeProduction',
choices: [
{
name: 'BridgeProduction(桥梁)',
value: 'BridgeProduction'
},
{
name: 'BaseProduction(基建项目)',
value: 'BaseProduction'
},
{
name: 'EnterpriseProduction(基建企业)',
value: 'EnterpriseProduction'
}
]
}])
const dirPath = checkPath(name, template)
await existsSync(dirPath)
const spinner = ora({
text: 'Take it easy :)Is downloading the template...',
color: 'yellow',
spinner: {
interval: 80,
frames: ['⠋', '⠙', '⠹', '⠸', '⠼', '⠴', '⠦', '⠧', '⠇', '⠏']
}
})
spinner.start()
download('username/base-template', dirPath, error => {
if (error) {
spinner.fail(`创建 ${name} 项目失败`)
console.log('失败原因: ', error)
} else {
const files = loadAllFiles(dirPath)
const options = {
files,
from: 'replaceOutputDir',
to: path.join(template, name)
}
replace.sync(options)
spinner.succeed(`成功创建 ${name} 项目`)
}
})
})
program.parse(process.argv)
|
使用 chalk 改变命令行颜色
安装
引入
1
| const chalk = require('chalk')
|
使用
这里只将 hello my-cli 改变为红色输出, 大家有兴趣可以修改别的
1
2
| const chalk = require('chalk')
console.log(chalk.red('hello my-cli'))
|
Finally, 来到最后一步了: 把自己一手一脚创建的脚手架工具发布到 npm 上吧~
发布到 npm
发布新包
- 使用
npm init 创建初始项目(我们已经完成)
- 在 npm 官网注册一个自己的账号(已有的请忽略)
- 在
npm 上搜一下看看自己即将发布的包是否已存在同名的包(自己的包名在 package.json 文件中可以查看修改)
- 如果
npm 源为淘宝镜像, 需要切换为 npm 源: npm config set registry=http://registry.npmjs.org
- 输入
npm login 进行登录
- 登录成功后, 在
my-cli 项目文件夹路径下的控制台中输入 npm publish 命令进行发布
- 发布成功后可以在
npm 官网查看
- 将源切换为淘宝镜像:
npm config set registry "https://registry.npm.taobao.org"
更新已发布的包
npm 包的每次迭代都要涉及到两个方面:
内容的变更就不说了, 要不就是修改了 bug , 要不就是增加新功能, 反正肯定是修改文件了
主要说一下版本的变更:
npm 采用语义化版本, 共三位, 以 . 隔开, 从左至右依次代表: 主版本(major)、次要版本(minor)、补丁版本(patch).
例如: 1.0.0 => major.minor.patch
关于版本变更规范:
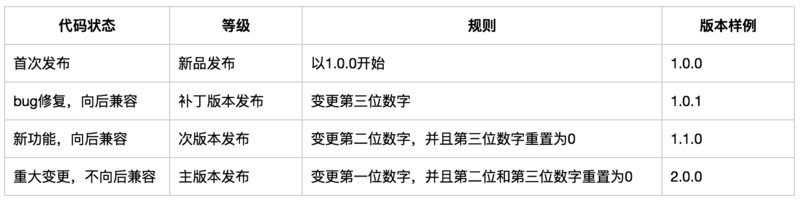
变更版本号的命令: npm version <major | minor | patch>
比如当前版本为 1.0.0, 我们修改了一个小 bug, 那我们执行 npm version patch 即可, 版本就变为 1.0.1, package.json 中的 version 也已变为1.0.1
其实 npm version 就是将 package.json 中的 version 版本 +1, 我们也可以手动修改, 不过得保证每次更新版本只能 +1
接下来发布就简单了: 由于我们发布新包的时候已经登陆, 所以只需要 切换源 -> npm publish -> 切换回淘宝镜像源, 搞定
参考资料
